How to Use Yoga for Osteoarthritis Relief
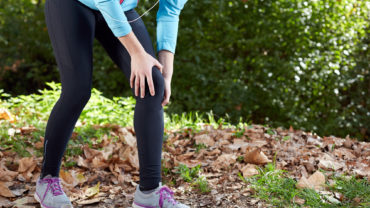
Are you struggling with the symptoms of osteoarthritis (OA)?
If you’ve been avoiding movement because of the pain or stiffness, that’s understandable. But the best thing you can do for those painful joints is moving them.
Have you considered yoga for osteoarthritis (OA)?
While the trend of vinyasa yoga has taken on a decidedly fitness-oriented focus, it’s getting easier to find gentler and slower hatha practices that could make a big difference in how you manage your pain.
Yoga Has Proven Effective Toward Easing OA Symptoms
In fact, one study compared patients with OA of the hands who tried yoga for six weeks with patients who did not engage in a sort of yoga.
Those who practiced yoga experienced significant relief in joint pain and stiffness during activity. They also had increased range of motion in their fingers.
That’s because the gentle movements of a traditional yoga practice stimulate blood flow to the joints. This is what makes yoga for osteoarthritis ideal.
If you’re not yet ready to seek out a slow and gentle class, then listed below are three poses you can do at home to begin feeling the benefits of yoga for your OA.
1. Target Hips and Knees with Warrior II
- Come to a standing position and step your feet wide – about 4 feet apart. All ten toes point toward the wall in front of you.
- Turn your right foot 90 degrees to the left, and align your heels. Stretch your arms long into a ‘T’ formation.
- Take a deep inhale, and when you exhale, bend your right knee until your shin is parallel to the floor. (For extra support, you can place a chair under your right thigh and let it rest there.)
- Be sure your knee doesn’t track to the right. Look down to be sure you can see your big toe and second toe.
- Gaze strong on the right hand and hold for up to one minute. Alternately, you could straighten the front leg on the inhale and bend back in on the exhale – making it more dynamic. Keep it gentle though.
- Hold this side for up to one minute, then switch sides.
2. Target the Spine with Cat/Cow Pose
- Come to a tabletop pose – kneeling down with your knees directly under your hips and hands directly under your shoulders.
- Take a deep inhale, then as you exhale, round your back – pulling your navel toward your spine, tucking your tailbone and bowing your head. This is cat pose.
- On the inhale, lift the tailbone toward the sky, let the belly dome downward and lift your gaze. This is cow pose.
- Continue this motion of cat on the exhale, cow on the inhale – following your breath and making sure you never move to a place of pain.
- Keep the movement smooth and comfortable to increase the circulation of blood to the spine.
Please note that if there are limitations in the use of the hands, wrists, or knees, this movement can be done from a standing position. You just place your hands on a table, chair or countertop.
3. Target the Hands with Prayer Position Stretches
- Make sure the hands are warm before beginning.
- Once the hands are warm, come to a standing position with the palms together in front of the heart. If that bothers the wrists, bring the forearms closer together.
- Take a deep inhale, and then as you exhale, gently press the fingers and palms together.
- Inhale and relax the shoulders back until only the fingertips are touching.
- Exhale to press the palms back together again. Continue for one to two minutes, gradually increasing the pressure.
Find the Benefits of Yoga for Osteoarthritis
Alleviate some of the symptoms of your OA while getting back out there and moving.
You’ll be so glad you did!


